
Kitchen Sink and Faucet Upgrades: DIY Fixes vs Professional Install
You’re staring at a dripping faucet or dreaming of a new pull-down sprayer, and the same question hits: can I do this myself, or do I need to call someone? I’ve been in that exact spot on dozens of jobsites, and the answer isn’t just about skill—it’s about your tools, your time, and what’s hiding under your sink.
Let’s cut through the hype and lay out the real trade-offs. The decision between a DIY fix and a professional install often comes down to three practical factors: the complexity of your existing plumbing, the specialty tools already in your kit, and your honest tolerance for unexpected problems.
A simple faucet swap on a standard sink can be straightforward. But if you’re facing a full sink replacement, corroded fittings, or the need to modify pipes, the job’s difficulty changes completely.
Your First-Step Diagnostic: Before You Decide
Let’s not talk in abstracts. Before you even think about buying a faucet or watching a tutorial, you need to know what you’re dealing with under your sink. This five-minute checkup will save you hours of headache. Grab a flashlight and follow these steps.
- Test the shut-off valves. Turn the hot and cold handles under the sink clockwise until they stop. Now, go up top and try to turn the faucet on. If no water comes out, your valves work—this is a green light. If water still trickles out or the valve handle spins freely without resistance, that valve is faulty. A stuck valve that won’t turn is a major red flag; forcing it can break the stem and cause a flood. This single issue often tips a job from DIY to pro.
- Inspect the connections. Shine your light on the water supply lines (the flexible hoses) and the mounting nuts holding the faucet in place. You’re looking for material and condition. Brass or chrome fittings in good shape are ideal. What you don’t want to see: a white, chalky mineral crust or, worse, greenish-blue corrosion (verdigris). That green gunk means the metals are reacting and are likely fused together. A common failure mode is a corroded mounting nut shearing off its threads when you try to turn it, leaving you with a piece of the old faucet still stuck to the sink. Prevention: if you see minor corrosion, apply a penetrating oil like PB Blaster and let it soak for 15 minutes before attempting to loosen anything.
- Map your sink’s deck layout. How many holes does your sink or countertop have? The standard is three holes (for hot, cold, and a separate handle or sprayer). Modern faucets often use a single hole. Also look for extra holes for a soap dispenser, side spray, or water filter. You need to match your new faucet’s configuration or buy a deck plate to cover unused holes. A deck plate is a simple fix, but forgetting to order one halts your project.
- Audit your tool kit honestly. This isn’t about screwdrivers. The specialized tools for this job are a basin wrench (for reaching up into the tight space to loosen the faucet’s mounting nuts), adjustable pliers, and possibly a tubing cutter if you need to trim pipes. If you don’t own these, factor in the cost and time to buy or rent them. Trying to use the wrong tool, like regular pliers on a deep-set nut, usually results in skinned knuckles and stripped fittings.
If you passed all four checks cleanly, you’re in a strong position for a DIY faucet swap. If two or more checks raised concerns, pause and read the next sections carefully.
The DIY Path: What You’re Really Signing Up For
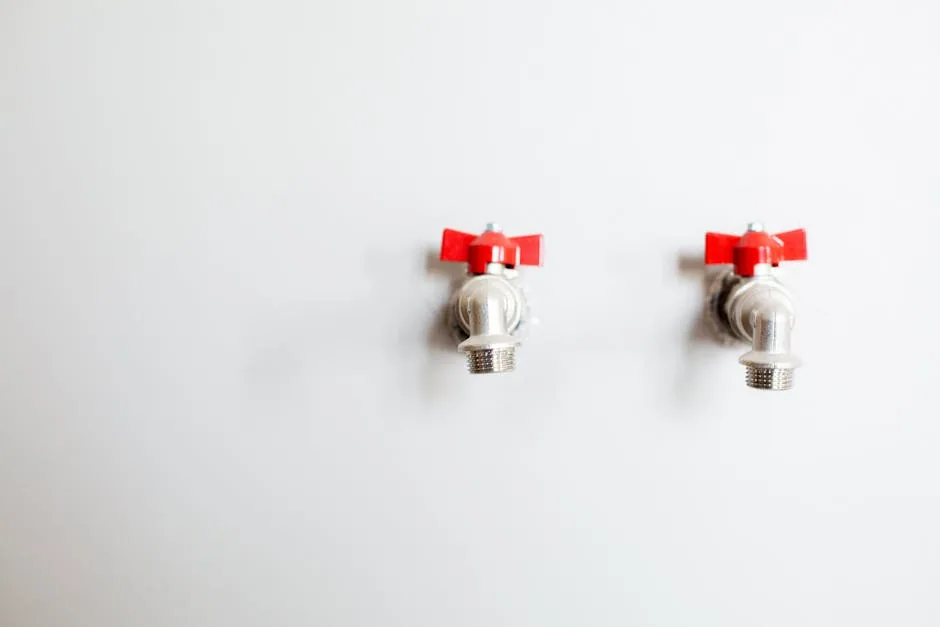
Photo by La Miko on Pexels
Okay, so your diagnostic looked good. Here’s the reality of a DIY faucet replacement. The process itself is logical: disconnect supply lines, remove the old faucet, clean the area, set the new faucet, reconnect everything. The challenge isn’t the sequence; it’s the execution in a dark, cramped, and often wet cabinet. You’ll be working on your back, holding a heavy faucet in place with one hand while trying to start a nut with the other.
The physical awkwardness is the first hurdle. The second is the “unknown unknown.” Everything can go smoothly until the last connection. I’ve seen brand-new flexible supply lines have a faulty rubber washer that causes a drip, requiring another trip to the store. Or the new faucet’s pre-attached hoses are a different length than the old ones, putting stress on the connections. These aren’t skill failures; they’re material and compatibility surprises that eat up your time.
For a standard single-handle or widespread faucet swap on a clean, accessible sink, budget 2-3 hours for a first-timer, even if a video says “1 hour easy!” That buffer is for reading instructions, taking photos of the old setup for reference, and dealing with a minor snag. Have a large bucket and towels ready for the water that will inevitably drip when you disconnect lines. Your success hinges on patience and methodical work, not brute force.
The true DIY sweet spot is a direct replacement where the only variable is the faucet itself. You’re not changing the sink, moving the plumbing, or dealing with antiquated pipes. In these cases, the satisfaction and cost savings are real. The essential plumbing tools for homeowners are a worthwhile investment if you plan to tackle more projects.
When Calling a Pro Isn’t a Luxury—It’s the Smart Move
Let’s reframe what you’re buying when you hire a licensed plumber. You’re not just paying for their hands; you’re paying for their truck full of every conceivable tool, their inventory of spare parts and fittings, and, most critically, their experience with worst-case scenarios. They’ve seen the corroded pipe that snaps, the oddball fitting that hasn’t been made in 40 years, and they know how to fix it on the spot.
You should strongly consider a professional for any of these conditions:
- Sink Replacement: Especially switching from a top-mount to an undermount sink. This requires precise cutting and sealing, and often involves modifying the countertop support.
- Relocating the Faucet: Moving the fixture to a new hole means drilling through stone or solid surface countertops—a high-risk task for amateurs—and extending water lines, which may involve soldering copper.
- Galvanized or Polybutylene Pipes: If your home has old galvanized steel pipes (grey, threaded) or grey plastic polybutylene pipes, the connections are fragile. Disconnecting them can trigger a chain reaction of leaks elsewhere. This is a pro-only situation.
- No Local Shut-Off Valves: If you only have a main house shut-off, a pro can quickly install proper sink valves, turning a future DIY job into a possibility.
The economic argument shifts here. A pro’s higher hourly rate is offset by their speed and the guarantee that the job will be done correctly, with proper permits if needed. They carry liability insurance, so if a connection fails later and damages your cabinets, it’s on them. For complex jobs, that risk transfer is worth the premium. As noted in many municipal plumbing codes, certain modifications legally require a permit and inspection, which a professional will handle.
Side-by-Side: Breaking Down the Trade-Offs
Let’s lay the two options side-by-side on the workbench. The biggest misconception is that DIY is just “parts cost” versus a pro’s “labor + parts.” The real comparison is more nuanced.
On Cost: DIY seems cheap—just the faucet price. But add the cost of a basin wrench, pipe thread tape, new supply lines (always a good idea), a tube of plumber’s putty, and maybe a special tool for your garbage disposal flange if you’re removing the sink. If you encounter a problem, add emergency parts runs. A pro’s quote is all-inclusive; the price you’re given is the price you pay, barring any truly hidden horrors they discover.
On Time: A pro will be in and out in 1-2 hours for a standard swap. Your DIY project will consume a half-day or full day of your weekend. The question is the value of your time and your tolerance for a non-functional kitchen.
On Control & Schedule: DIY wins on flexibility. You can start at 8 PM if you want. You choose the exact faucet. A pro requires scheduling, which might be days or weeks out, and they may have preferences for brands based on reliability, which can guide your purchase.
On Risk: This is the decisive column. Your DIY risk is water damage from a slow leak you don’t catch, improper installation that voids the faucet’s warranty, or personal injury from straining or tool slips. A professional’s work is typically guaranteed, and their insurance covers accidents. For a full sink replacement, where a poor seal can lead to catastrophic cabinet rot, the pro’s risk mitigation is invaluable.
DIY vs. Pro: Quick-Reference Decision Matrix
| Factor | DIY Route | Professional Route |
|---|---|---|
| Typical Cost Range | $150 – $400 (Faucet + tools/parts) | $300 – $800+ (Labor + faucet) |
| Time Investment | Half-day to full day (3-8 hours) | 1-3 hours on site |
| Skill & Tool Requirements | Moderate handiness, patience, and must acquire/rent specialized tools (basin wrench, etc.) | None required from you. Pro provides all tools and expertise. |
| Risk Level | High. You bear all risk of leaks, damage, improper install, and injury. | Low. Work is guaranteed/insured. Risk transfers to the contractor. |
| Best For Scenario | Direct faucet swap on a clean, accessible 3-hole or single-hole sink with working shut-off valves. | Sink replacement, relocating plumbing, homes with old/poor condition pipes, or if you lack time/tools/tolerance for problems. |
Use this table as a gut-check. If your project details align more with the “Professional” column in two or more factors, especially Risk and Skill, start getting quotes.
My On-the-Job Decision Framework
Over the years, I’ve boiled this down to a three-question filter I run through mentally. It’s fast and keeps emotion out of the decision.
1. Access: Can I physically reach all the connections with the proper tools? Get under your sink right now. Is there a garbage disposal, dishwasher drain line, or water filter in the way? Can you fit your arm and a basin wrench up to the mounting nuts? If the answer is “barely” or “no,” your frustration and time cost skyrocket. This is a practical constraint, not a skill issue.
2. Condition: Are the existing fittings clean, standard, and in good shape? Refer back to your diagnostic. Shiny brass = good. Corrosion, mineral buildup, or non-standard piping = bad. One authority guideline I follow is from manufacturer technical manuals: if more than moderate force is needed to loosen a connection, stop and reassess. Forcing it usually breaks it.
3. Compatibility: Is the new part a direct fit for the old holes and connections? This means hole count, sprayer hose connection type, and supply line thread size. If you’re changing any of these, you’re adding complexity. A deck plate or new supply lines can solve this, but you must know you need them before you start.
Three “Yes” answers? You’re likely good for DIY. One “No”? Pause, research that specific issue, and see if it’s a simple fix (like buying a deck plate). Two or more “No”s? Especially if “Condition” is a no, your smartest and often cheapest path long-term is to call a professional. This framework prevents the optimistic overreach that turns a Saturday project into a Monday emergency.
The Most Common (and Costly) Oversights I See
Even with the best plans, small details derail projects. Here are the top three practical mistakes I’ve had to help fix, and how to avoid them.
Not checking the sink’s thickness.
New faucets come with mounting hardware designed for a standard sink deck thickness—usually about 1.25 inches. If you have a thick granite, quartz, or composite farmhouse sink that’s 1.5 inches or more, the supplied bolts and washers may not be long enough to secure the faucet. You’ll get everything connected only to find the faucet wobbles. Prevention: Before you buy, measure your sink’s deck thickness at the faucet hole. Compare it to the “maximum deck thickness” spec in the faucet’s manual or online product details.
Overtightening connections.
The instinct to crank a fitting “one more turn” to stop a drip is almost universal. This is a major error. Over-tightening can crack the ceramic disc cartridge inside the faucet (causing an internal leak), strip the soft brass or plastic threads, or warp the rubber sealing gaskets, creating a worse leak. Failure mode: a slow drip from the handle base that starts a week after installation, leading you to believe the faucet is defective. Prevention: Hand-tighten all connections first until they are snug. Then, using tools, give them only an additional quarter to a half turn. For threaded pipe connections, use thread seal tape or pipe joint compound correctly—wrapping tape more than three times can cause over-tightening and splitting.
Forgetting to flush lines and remove the aerator.
When you turn the water back on after installation, debris from the pipes—tiny bits of sediment, solder, or old gasket material—will travel toward your new faucet. If you don’t flush the lines first, this debris clogs the aerator screen immediately, resulting in puzzling low water pressure. You’ll think your install failed. Prevention: Before connecting the new faucet’s supply lines, disconnect them from the shut-off valves, point them into a bucket, and turn the valves on for 10 seconds each to flush the lines. Also, remove the aerator from the end of the faucet spout for the initial startup. Let the water run for 30 seconds to clear any remaining debris, then reinstall the aerator.
Your Next Step
So, what’s your next step? Don’t just guess or get swayed by a sale on a fancy faucet. The most powerful tool you have is information from your own kitchen. Do the five-minute diagnostic I outlined at the start. Shut off the water, get under there with a flashlight, and really look. That look—at the valve condition, the fittings, the space—will tell you more than any article or video ever could.
If what you see looks straightforward, accessible, and in good shape, you’ve got a solid DIY candidate. Order your faucet, gather your tools, and block off a Saturday morning. If you see corrosion, odd fittings, a tangled mess of pipes, or you simply feel that knot of uncertainty in your stomach, start getting quotes from licensed plumbers. Either way, you’re making a decision based on your actual situation, not a vague idea of difficulty. Now go take a look.